Translate

Saturday, July 14, 2012

Tutorials Pinwheels

Hello friends and happy Saturday. I have to apologize some of you were looking for the tutorial at the bottom of the page, but I forgot to link this page, what was I thinking, this is what happened when you blog late at night. I was on a roll putting a few tutorials together, the videos, and other things that I make so you can make them also. I don't mind sharing, but here it is, hope I link it right. Oh, I'm also trying to go to some parties, be a bit more "out there" its not my style, but in blogland is a what you are suppose to do.

One thing you can do is before you start spray your pages with a sealer to make them stiffer, I didn't because my pages were good. Also if you
like glitter, you can add it on the edges, but I don't like glitter that much, I like things organic, old,original, kind of things, the more "natural" the better.

I made the cute pinwheels and they are so cute, I wanted to share the tutorial with you. I hung them on an old frame I painted, and added some lavender, just for fun. I made some holes and threaded them kind of rustic and organic. You can
hang them with the little clothespin, this is just how I did it.


Materials:

You need: some book pages, ( I used some pages from an old book that is in bad condition)

You will need: scissors, the old glue gun, a ruler, small clothespins, ( I didn't have any, so I used a hole puncher, and made a hole on each one and thread it some old twine. Your choice.

This is a simple tutorial:

First of all cut your paper into a square 4" by 4"


I am a visual learner, sorry
for my light in this picture, but here you will fold the paper into
the two triangles.


Now, we have two triangles. Take the scissors and cut on each triangle line a little bit towards the middle. You will cut four times.

Now you are ready to fold your first triangle and put a dot of hot glue in the middle, be careful, don't get burned.

Now, make the next fold and glue a dot in the middle.


And you are done, very easy and cute.
Now, you need to decide if you want to use the mini clothespins or run a ribbon or twine like I did.
Just make about seven of them and you will have a beautiful unique pinwheel banner that nobody
else has in their home, feel proud and "make and display" you are a star. If you make one please
send me a picture and I will feature in my blog. A great idea is to make one for "Memorial Day"
red, blue, and white, I am motivated and might do one for the barbecue on Monday,

I hope you enjoyed the tutorial, and try it.


Blessings,

Martha

My Garden of Eden


Wednesday, July 4, 2012

Happy 4th

Dear Friends:

SoPinned Image 4th of July Inspiration.  I did a tutorial on the pinwheels, I just love them, the tutorials are at the end of the blog. Easy and cute for many parties or just to decorate.
These are from the Brown Shed,

From "Country Living"  so cute,
4th


Cute pillows I have the stripe one but I need to make a all star pillow. 


Pinned ImageI found these lovely at :
From vignettedesign.blogspot.com

I'm proud to be an American.

Martha


Monday, July 2, 2012

From Not so trashy to a treasure? and a Beach House

Hello sweet friends:

Sometimes, we find pieces that are not so bad, I'm still working on my big desk, its almost finished but I discovered a big surprise, got a bit sad about it, but "where there is a will there is a way"  so it will get
done.

Here is a little inspiration I did a chest like this one but I like this version from "TypeA" also.love the handles

Mine is a bit different, if you click on my blog on the page "Sofia" you'll see it.
Love the green/blue chest
I love the Beach House Decor, and I stumbled upon this beauty from Florida.


Huge topiaries in beautiful stone urns, coral, just an entrance.


The chandelier is so beautiful.


A comfortable and relaxing family room, you don't even notice the tv on top of the fireplace.  Some people have a problem with this, I love how it looks in this room.


 Cozy corner in the kitchen, love love.This is from Cozy Casual Home.  Love these homes.

Enjoy the inspiration,

Martha

Sunday, July 1, 2012

From Trash to Treasure

Happy 4th. to all my followers. Thanks so much for the lovely comments.

Here is "from the trash to a treasure"

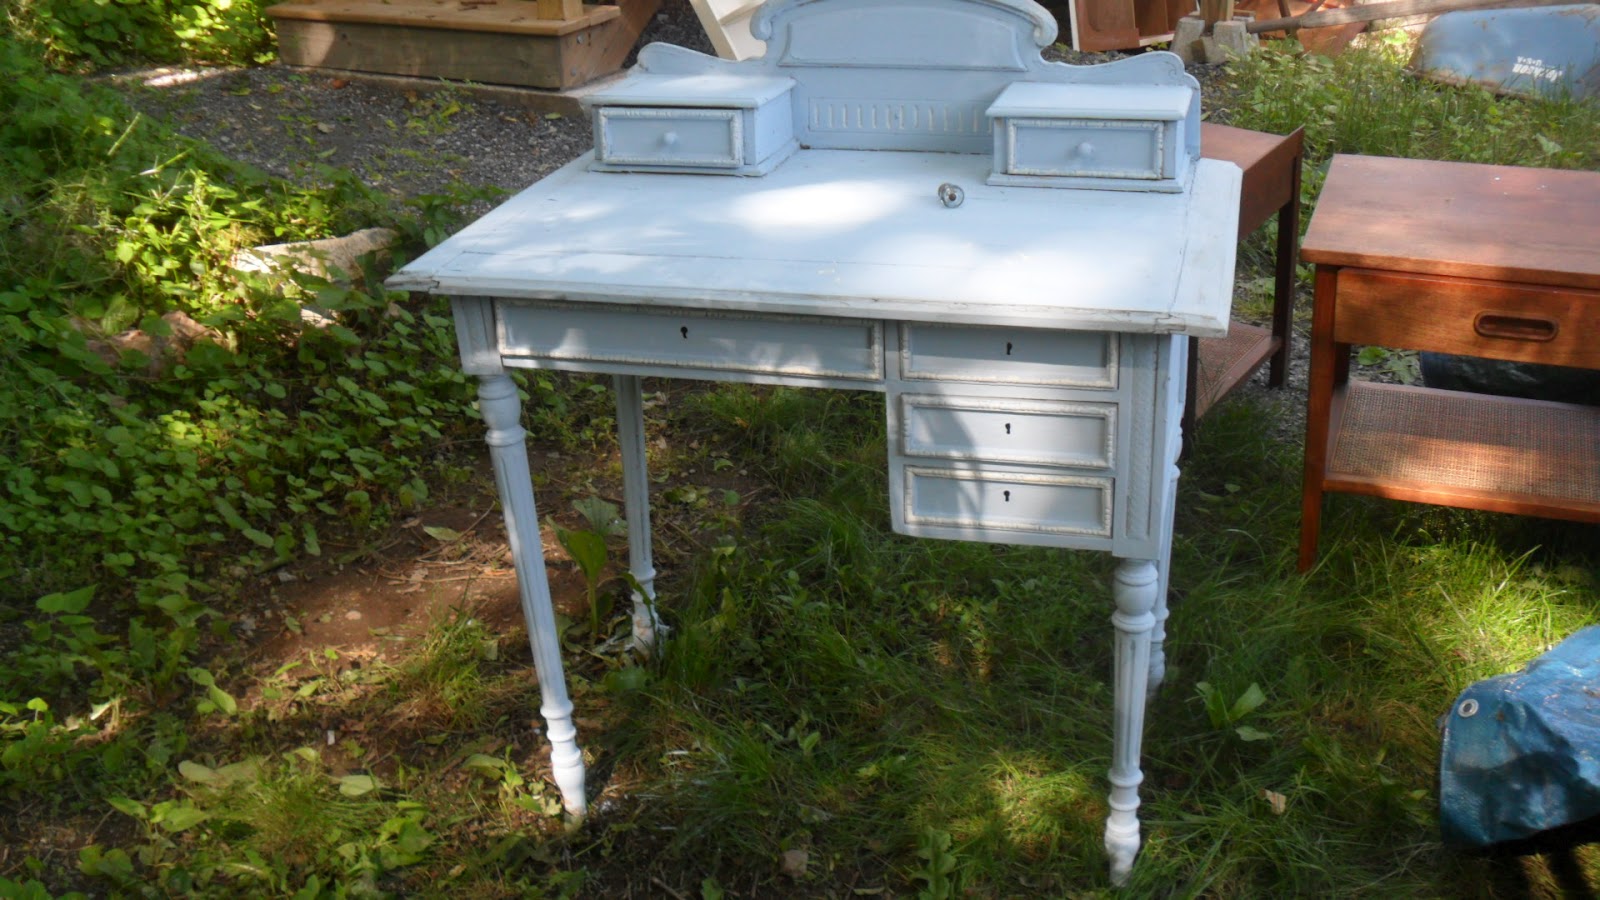
I found this little desk/ vanity

in the curb, take a look, I video a little bit but didn't talk, oh
well, I pushed the wrong button, but its nice, a bit of veneer damage on the top, but it adds character to the piece.
I will continue the tutorial for you.

Step 1:  I mixed equal parts of  Provence, Old white, and a bit of water, the paint is too thick. 

Step 2:  Mix a dark gray in equal parts and paint the rossettes.

Step 3:  Mix gesso and paint rossettes, repeat with paint and gesso for the aged look several times. this is a little pic...

to be continued,


Wednesday, June 27, 2012

Summer French Desk

Hello friends:

Are you still enjoying summer?, its great.

Here is the latest on my French desk, I keep adding, redoing, and its looking better everyday.


What do you think?  pretty good for a Chalk painter without experiences or classes.  It is possible,

Step One:  Choose a color. I chose Loui Blue, Old White, and both waxes.

Step Two:  Just give it a coat. of Loui Blue

Step Three:  Maybe it needs another coat ( my desk just needed one coat)

Step Four:  With a very very fine paint brush paint the details in Old White or any white
You like, I have loads of Old White so I need to use it.  This step takes a long time, if you
make a mistake just clean it with a rag and paint it over.

Step Five:  Apply the clear wax all over the piece, so to preserve it, I don't have the expensive brushes so I just do it with good rags.  JUST DO SMALL PIECES AT A TIME.

Step Six: Distress with the dark wax.  ONLY APPLY a DAB and rub. Don't apply too much or
it will look very dark.  If you make a mistake just apply the clear wax and it comes off. Or just paint the spot over.
I didn't apply much dark wax, just a little was enough for me, because I like to see the light blue and the white. To be honest I almost didn't do the dark wax because I love the blue is very pale, but I decided to experiment a bit.
Another TRICK:  With an old brush dab half of the brush with dark wax and half with paint and play with this. If you don't like it, just erase it with a rag.  I did this on the corners and top on the design. I use old brushes, cheap ones and save money.

I'm thinking of doing a video for you, remember, I learn by doing, experimenting, , I believe in classes but unfortunately my time is so limited I have to do it myself.  This desk is in my living room, people want it but I love it myself, and after spending two weeks painting it I cann't give it away.

Basically the best way to learn how to paint furniture is by doing. You can also learn from Miss Mustard Seed, or Shauna, but the best way is to do it yourself and learn from your mistakes .

Hope you enjoy it.

Now to the next piece, I found this gorgeous bureau and I'm not painting it, I love oak, the color,
the patina, the coasters, the hardware I just love it. So I'm leaving it alone. SORRY


Isn't this gorgeous, I have to leave it as it is, cannot destroy beautiful oak. The owners took care of the bureau and I will too.

Check my video on how I painted my desk through trial and error with Chalk paint.

Love

Martha